How to Build a Membership Site in WordPress Using Paid Memberships Pro and Elementor?
👋 Need help building or fixing an Elementor website?
I design fast, conversion-focused WordPress sites using Elementor.
If you’re a blogger, creator, or run a service-based website, chances are you’ve thought about building something that gives you consistent recurring income, not just random affiliate clicks or ad revenue.
That’s where membership sites come in.
A membership website lets you offer exclusive content, resources, or perks to paid users. It’s predictable, scalable, and builds real community; something that ads never can.
And the best part? You don’t need to hire a developer or buy expensive SaaS tools like Teachable or Kajabi.
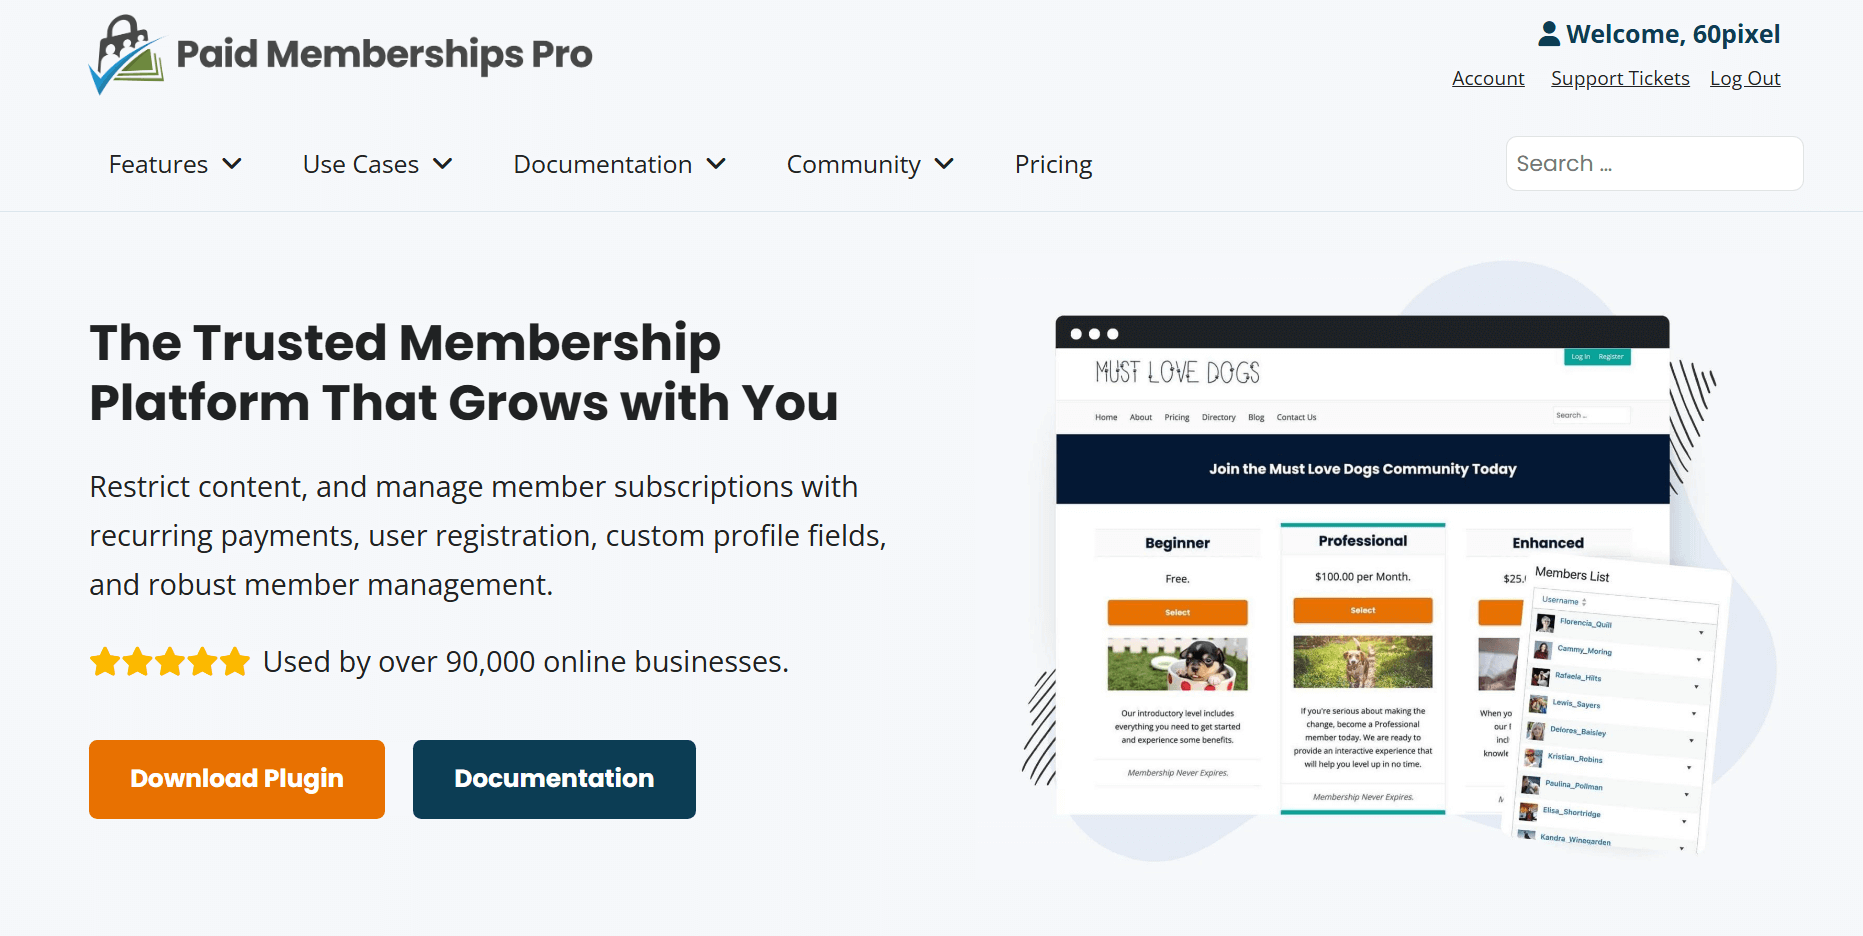
You can build your own powerful membership platform using WordPress, Elementor, and the Paid Memberships Pro (PMPro) plugin.
I’m Kuldeep Rathore, founder of 60Pixel, a web design and digital solutions agency, and in this guide, I’ll show you how to set up your own membership site step by step: the same method we use for our clients who want to turn their audience into paying members.
So let’s dive in…
Why Membership Sites Beat Ads and Affiliates
Let’s be honest: ad revenue and affiliate marketing are great when traffic is high, but they’re inconsistent. A single Google update can wipe out your earnings overnight.
Memberships, on the other hand, bring predictable monthly income. Whether you have 50 members or 500, you know what’s coming in.
It’s not just about money either, memberships help you:
- Build a loyal audience
- Deliver deeper value
- Create a sustainable business
Sounds good right?
Okay, now let me share why you need to choose this plugin for your membership site…
Why Choose Paid Memberships Pro (PMPro)?
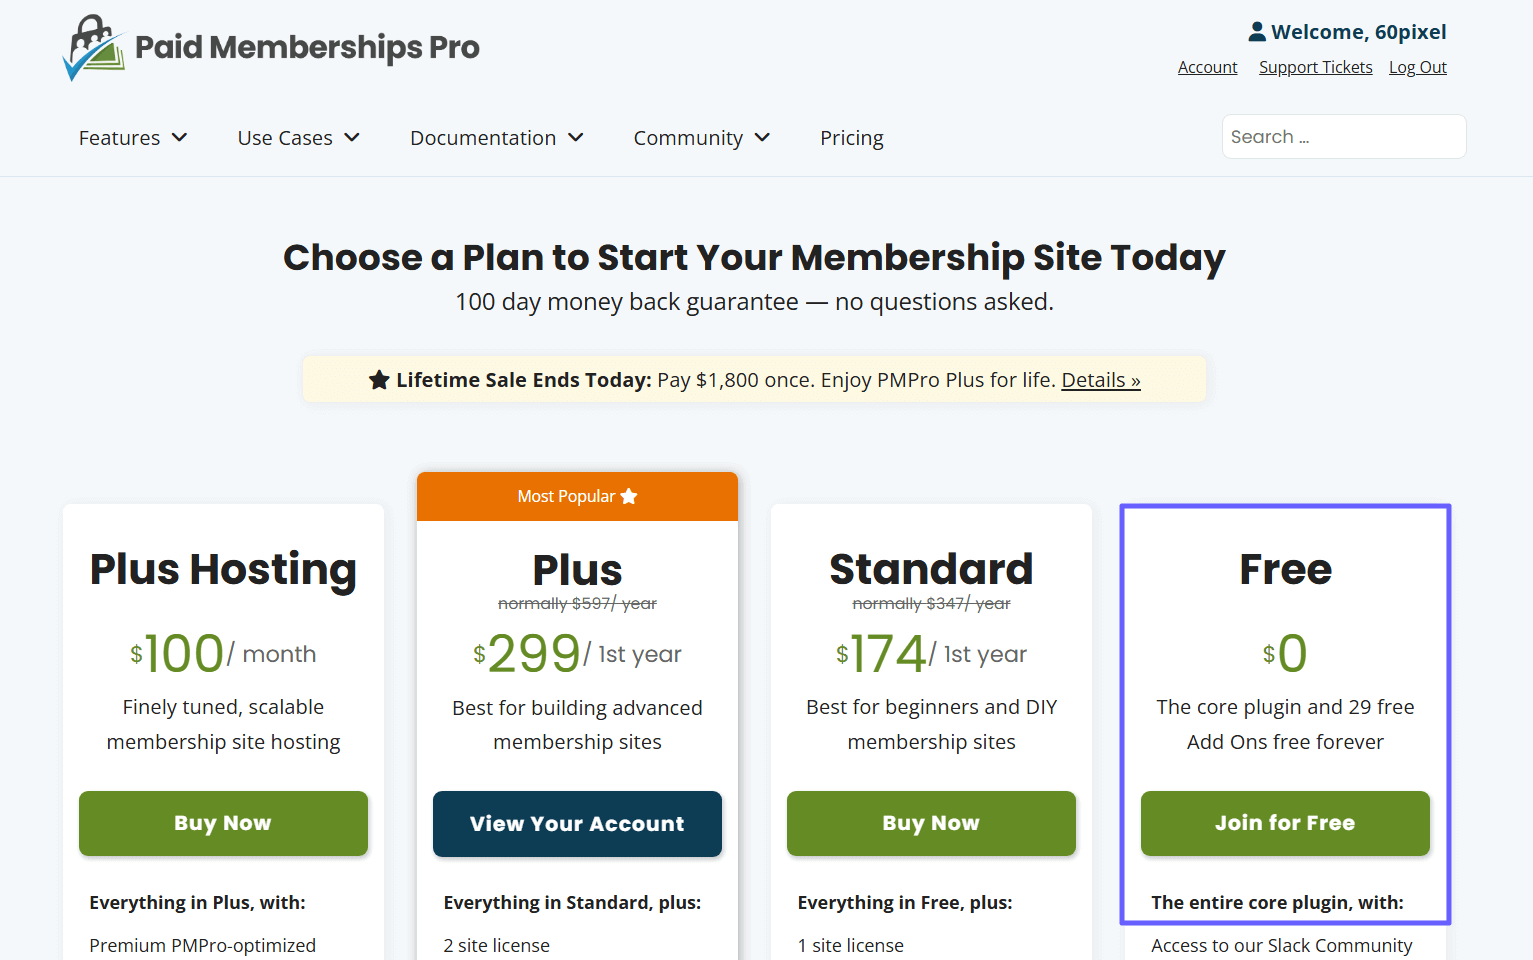
You’ll find dozens of membership plugins in WordPress — but most either charge heavy monthly fees or restrict features.
Paid Memberships Pro (PMPro) stands out because:
- It’s open-source and free (you can start without paying a rupee).
- It’s scalable — from one level to hundreds.
- It works seamlessly with Elementor & other page builders (Divi, Beaver Builder, Oxygen, etc) giving you full design freedom.
- It supports recurring payments, discount codes, email automation, and more.

Whether you’re selling premium tutorials, templates, or courses, PMPro gives you complete control.
Let’s dive into the step-by-step guide…
How to Build a Membership Site in WordPress using PMPro & Elementor (Step-by-Step in 2025)
Step 1: Install and activate Paid Memberships Pro
Let’s start setting things up.
- Go to PaidMembershipsPro.com and create a free account.
- Download the PMPro plugin ZIP file.
- In your WordPress dashboard, go to Plugins → Add New → Upload Plugin and upload the file.
- Click Install Now, then Activate.
After activation, PMPro setup wizard opens up.
It is optional to create pages. There are other settings you can configure in the wizard prior to getting to the plugin. If you configure settings, PMPro will create important pages for you. You will see Membership Levels, Checkout, Confirmation, Account, and Billing.

These pages may look plain right now. That is fine.
We will style them later with Elementor. For now, open the Memberships menu in your dashboard and confirm that the key pages have been created and assigned.
Pro Tip: Keep the default URLs short and clean. For example, use yoursite.com/levels and yoursite.com/checkout. Short links are easy to remember and helpful inside emails.
Step 2: Create your membership levels
Levels are the backbone of your offer. Think about the real value you will provide. Most creators start with two or three levels. A Free level for lead generation. A Premium level with the main benefits. Maybe a VIP level for extras like live calls or templates.
Think of membership levels like different subscription plans. You can have:
- Free — basic content
- Premium — exclusive tutorials, downloads, or templates
- VIP — 1-on-1 coaching or priority support
Here’s how to create them:
- In your WordPress dashboard, go to Memberships → Settings → Levels.
- Click Add New Level.
- Name your level (like “Premium Access”), set price (say ₹499/month), and save.
- Repeat for your other levels.

Once done, PMPro automatically connects the checkout and account pages.
If you are not sure about pricing, start simple.
One client began with a Free level and a Premium level at a modest monthly price. After two months, they added an annual plan with a small discount. The annual plan improved cash flow and reduced churn. You can do the same after you get your first members.
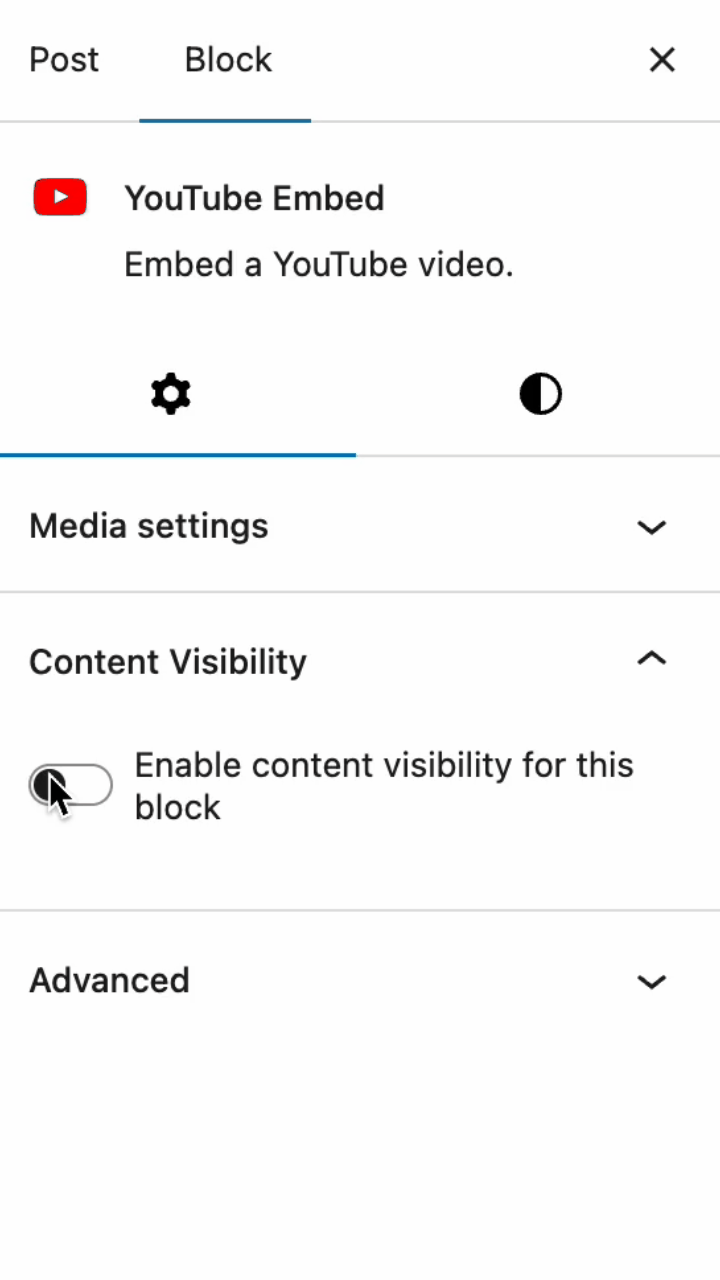
Step 3: Restrict content for Members Only
Now that your membership levels are ready, it’s time to decide which content should be accessible to which members.
Quick Note: You can restrict anything in WordPress with PMPro https://www.paidmembershipspro.com/restrict-access-wordpress/
PMPro makes it extremely simple:
- Open any post or page you want to restrict.
- Scroll down to the Membership Required section below the editor.
- Choose which level can access it (for example, only Premium users).
This way, if a visitor does not have access, they will see a message rather than the full content.
Do not hide everything behind a wall. Keep public content alive for discovery and search.
You can add a friendly teaser at the top or middle of premium content (a short paragraph works well) and explain what the full post covers and why a member would care.
For conversions, place a bright button that links to the correct checkout level.
One of my clients doubled conversions by adding a teaser and a single, focused button near the point where the best tip started.
Elementor helps you present this clearly. Create a short teaser section as a reusable template. Drop it wherever you gate content. Keep the message concise. Use a supportive tone. Avoid hype.
People upgrade when they understand the value, not when they feel pushed.
Step 4: Design your core pages with Elementor
By default, PMPro pages are plain and simple. That’s intentional & it helps them blend with any WordPress theme. But you can style them beautifully with Elementor.
Here’s what I recommend designing:
- Homepage: Clear value proposition — why join, what members get.
- Pricing Page: Elementor pricing widgets or cards.
- Checkout Page: Use Elementor templates to add trust badges, testimonials, and your brand’s color scheme.
- Thank You Page: Add a short welcome video or onboarding steps.
Make sure to design each page in a way that matches your brand. Focus on the pages that affect sign ups first. That means the Levels page, the Checkout page, and the Thank You page (which is also referred to as Membership Confirmation page)
You can improve the Account page next.
Pro Tip: On the Checkout page, keep the form clean and friendly. Remove distractions. Keep the layout in a single column. Add small trust badges below the form. If you have testimonials, place one short quote near the button. A more confident checkout design often improves conversion.
Step 5: Connect payments and enable recurring billing
This is where your membership becomes a real business. PMPro supports popular all major payment gateways.

Here’s how to set it up:
- Go to Memberships → Payment Settings.
- Choose your preferred gateway — Stripe or PayPal.
- Add your API keys (you’ll find them inside your payment account).
- Select currency (INR or USD) and save changes.
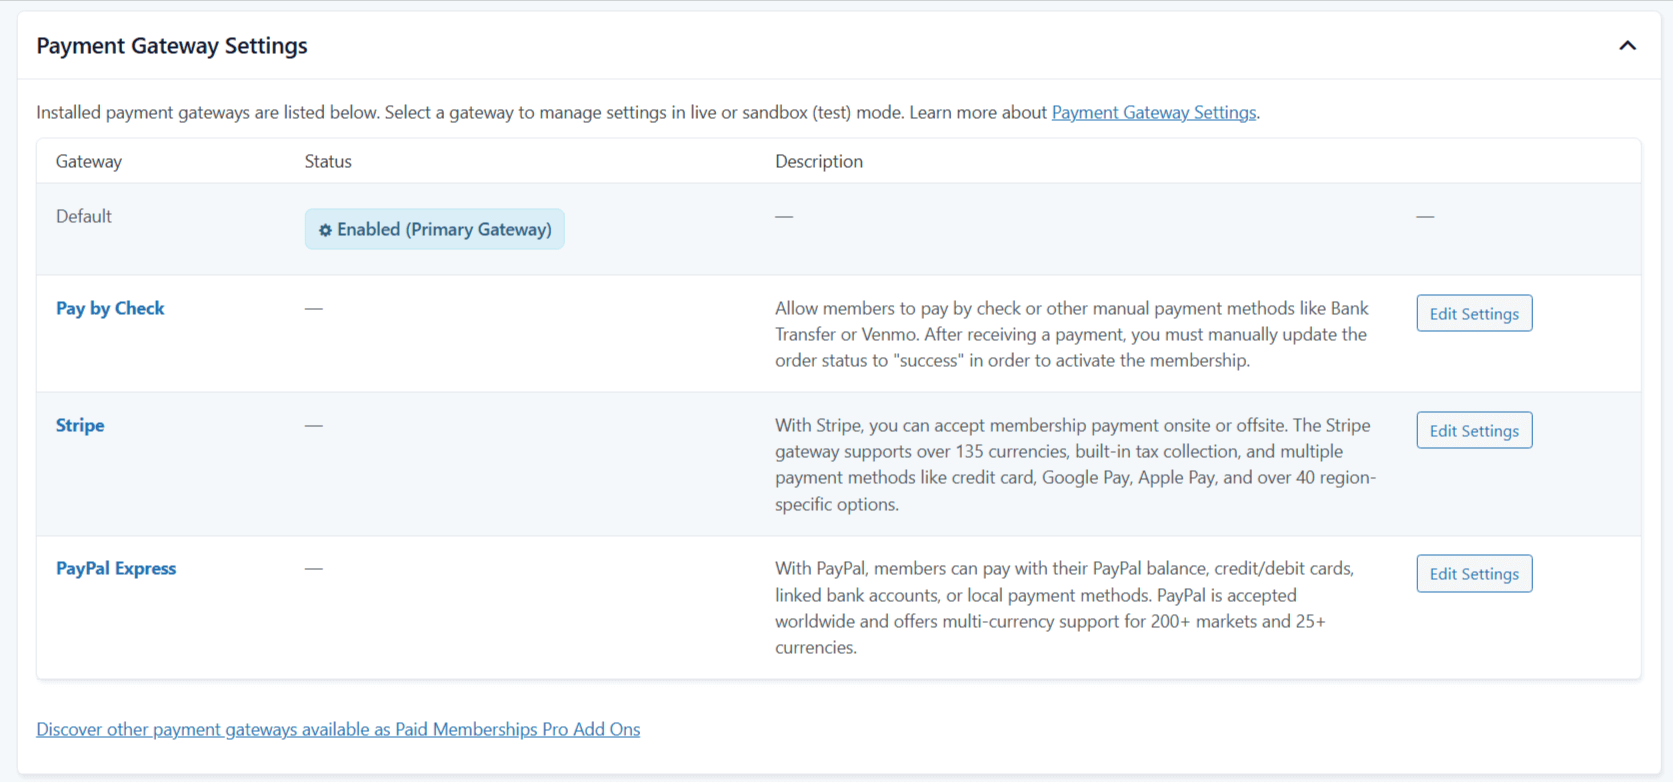
If you’re in India, you can also integrate Razorpay using an addon.
Note: Always test in sandbox mode first & run a test.
A dry run now prevents support tickets later.
Next Steps:
- Create a test pricing level for one unit of your currency.
- Open your site in a private window & complete the sample purchase.
- Check your email for the receipt, confirm that your new test user can access a restricted post, confirm that the Account page shows the correct level and the next payment date.
- Once done. delete the test level.
Note: You do not have to have a specific testing level. You can set Stripe or PayPal to be in a sandbox/testing mode. But just to test the full flow, I recommend doing it.
Step 6: Map and test the full member journey
Before launching publicly, do a quick self-test to ensure everything works.
Follow these steps:
- Open your website in an incognito window.
- Go to your pricing page → select a plan → complete the checkout.
- Confirm if the system redirects to the “Membership Confirmation” page.
- Try accessing a restricted post — it should now open.
This will help you make sure the entire process (sign-up → payment → access) is smooth.
Pro Tip: Make a short journey map. It can be a simple box diagram. Add boxes for Levels, Checkout, Confirmation, Account, Premium Post, and Support. Write the immediate goal for each box. For example, on the Levels page the goal is a plan click. On the Checkout page the goal is a completed payment. On the Account page the goal is the next action, like visiting the Getting Started guide. When you know the goal of each step, your copy will be clear and your design will support it.
Step 7: Prepare content that converts and retains
The best membership sites publish valuable content on a schedule. Decide what is public and what is members only. Publish public content that answers search questions. At the end of those posts, link to members only content that goes deeper.
Also, create one pillar page for members who just joined. Call it Getting Started.
Inside it, link to your best premium pieces. Explain how to use the site. Add a short checklist for the first day and the first week. Put that link on the Thank You page and the first welcome email.
If you provide files or templates, place them on a members only page. Keep the layout clean. Use short names for files. Add a small line that explains when to use each file. People stay when they feel guided.
All these pages can be designed beautifully using Elementor.
Step 8: Add email follow ups that feel personal
After signup, send a short welcome sequence. Day one can deliver the Getting Started guide. Day three can share a useful tip that solves a common roadblock. Day seven can ask for feedback.
Keep your emails short and focused on one action & avoid constant promotions. Build a habit for the member. When a member feels momentum, they stay longer.
For visitors on your Free level, you can send a different sequence.
For example, you can share helpful public posts first. Then introduce one premium piece that solves a real pain. Offer a short trial or a limited time upgrade.
The goal here is to keep it friendly as people value patience and clarity.
Step 9: Keep support simple and fast
Members appreciate quick answers.
Just do one thing: add a small Support link inside the Account page. Keep the form short. Ask only what you need to help. If you use a help desk, connect it. If you handle messages by email, set a clear response window and keep your promises. Fast support reduces refunds and strengthens word of mouth.
Also, you can create a short FAQs page for members & Include topics like billing, pausing a subscription, and how to change plans, etc.
This way, you can keep your inbox calm.
Step 10: Track the numbers that matter
The last step to building a successful membership site is to track the numbers that matter.
Carefully look at your sign up rate, conversion rate on the Levels page, refund rate, and churn.
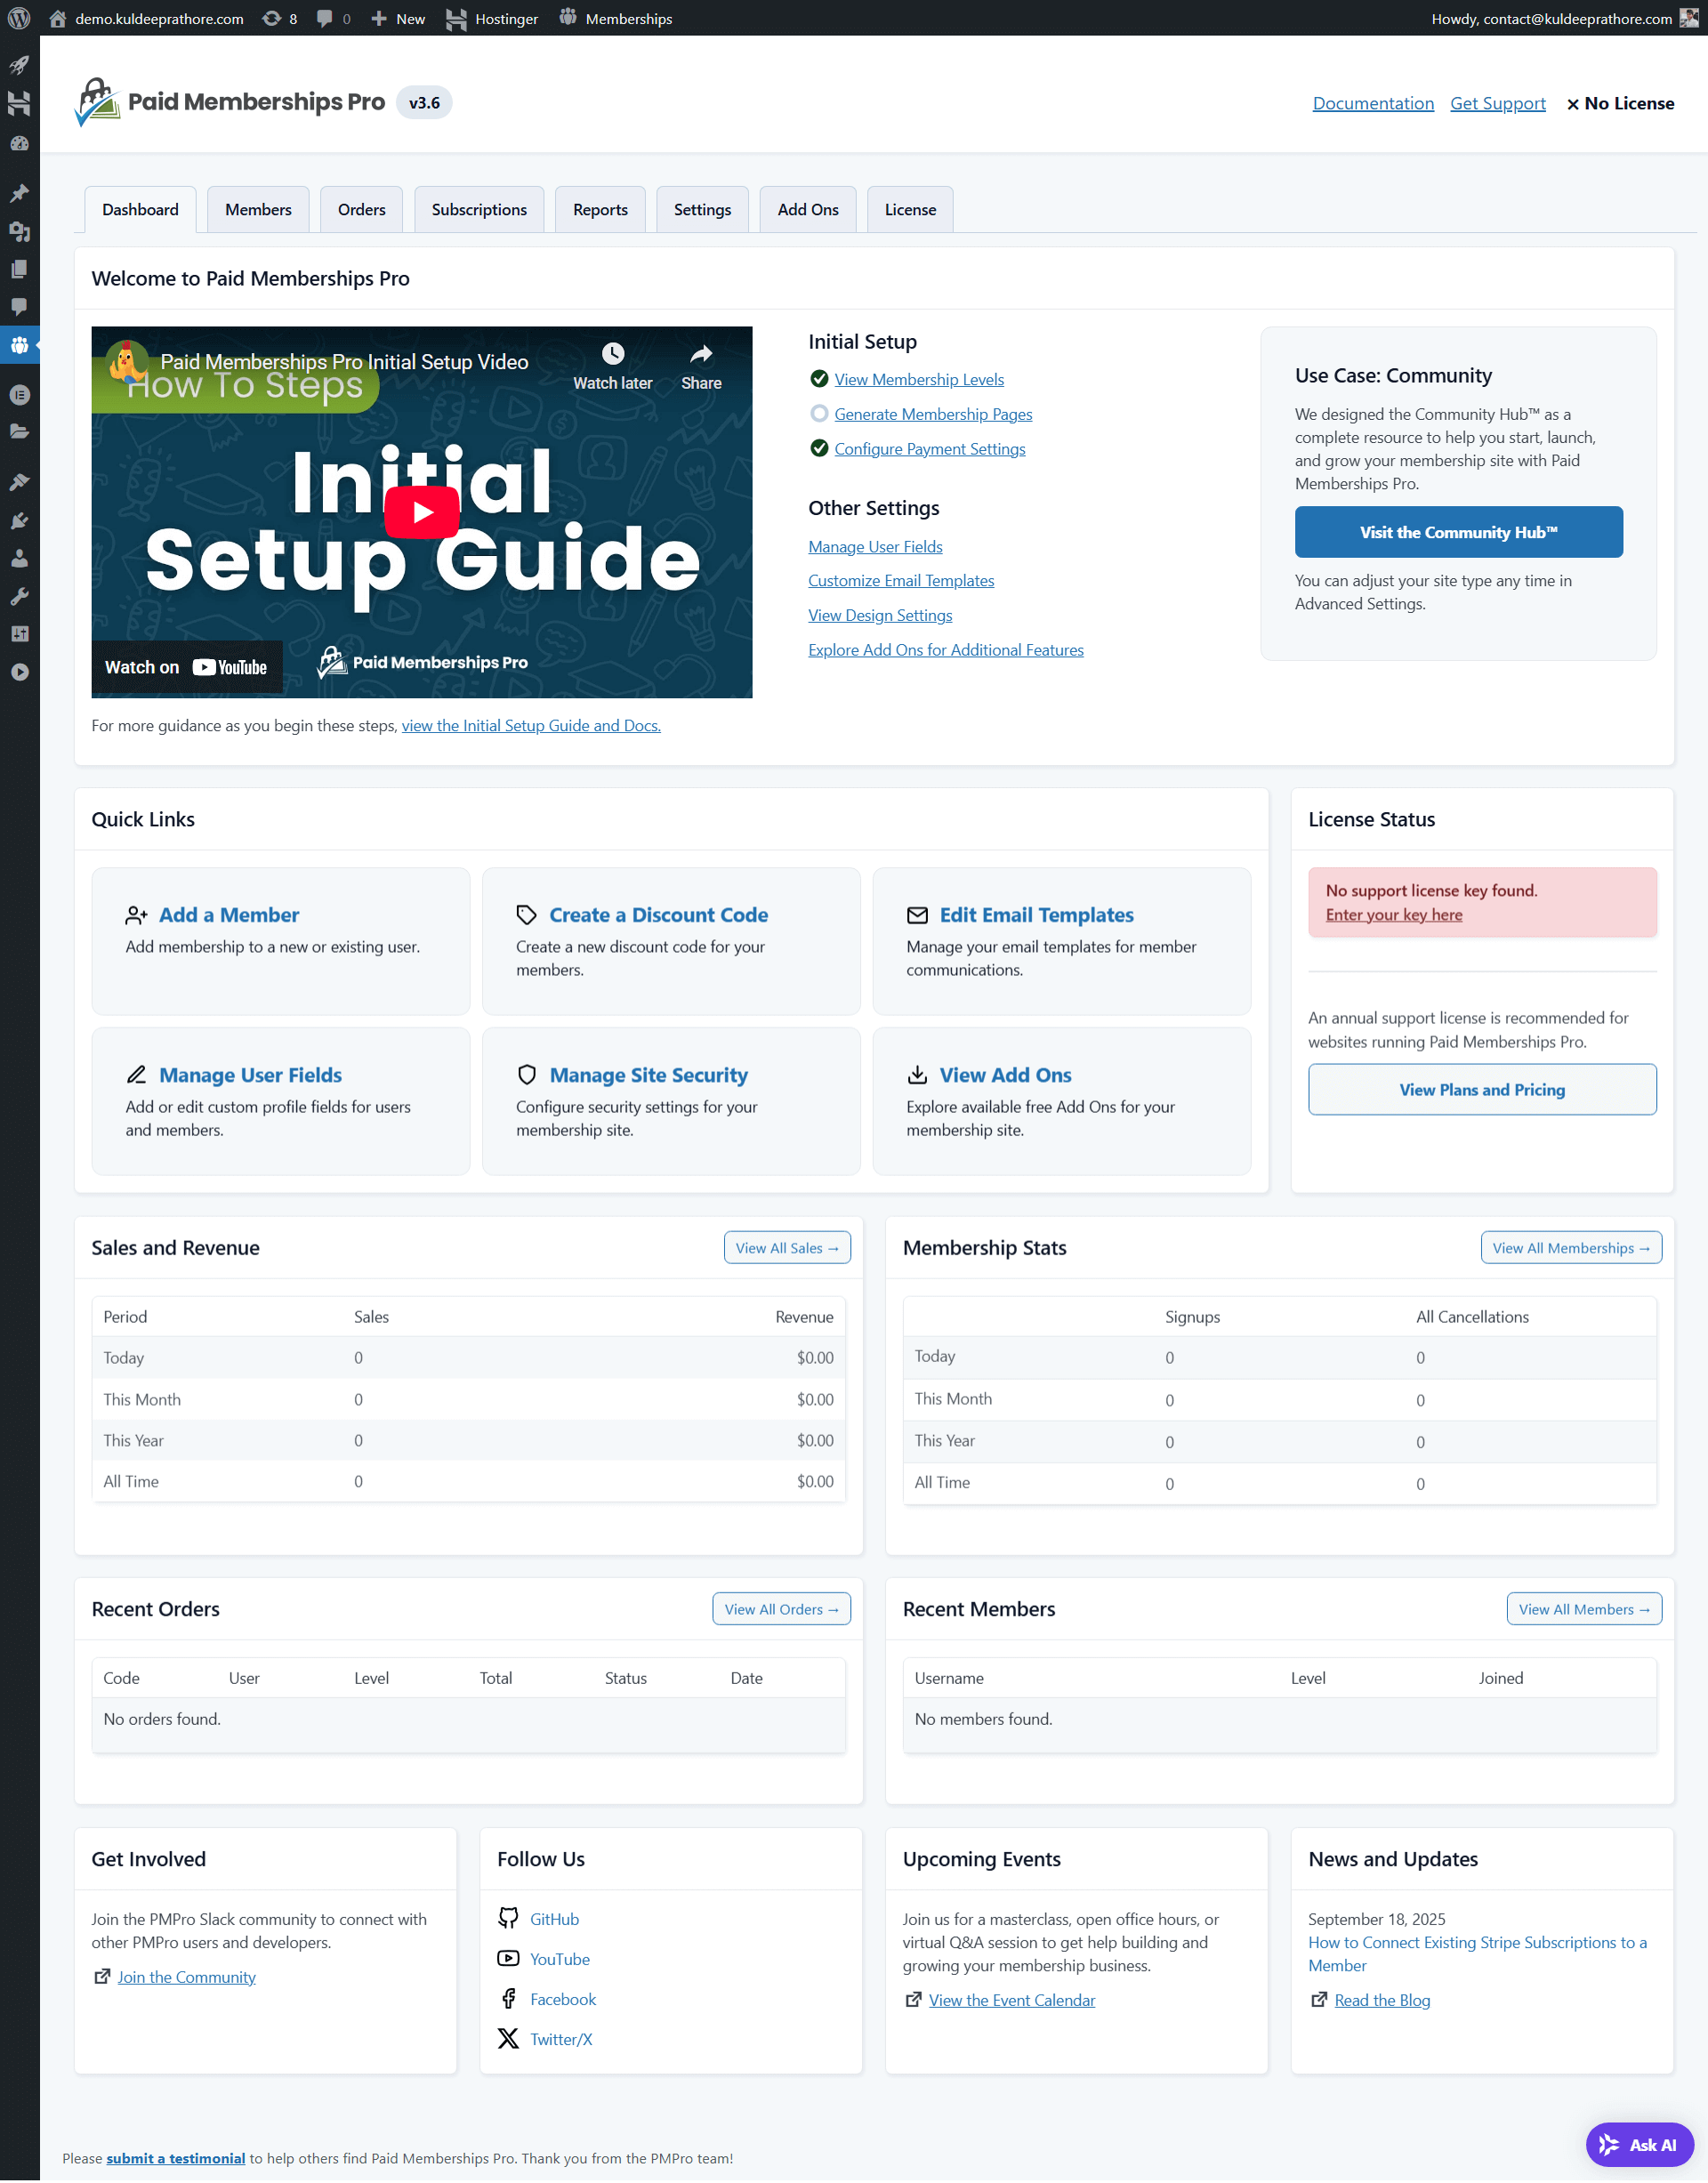
You can use PMPro reports and your analytics tool. Here's how the dashboard looks (fresh account…)
And note that you don’t need to chase every metric. Keep your focus on the steps that block growth.
For eg: If many people visit Checkout but do not pay, improve trust. Also, you can use the PMPro's Abandoned Cart Recovery Add on that can help you win back these users.
If traffic is low, publish more public content and improve internal links. If churn is high, check onboarding and ask for feedback after the first week.
These small fixes here can produce steady gains.
Just to help you understand better, I’m sharing one of the example from a client project: We added a short reassurance line under the checkout button.
It said what happens next in plain words & this small line reduced drop off. Why?
Because people want to know what to expect, so tell them before they have to ask. It’s as simple as that.
FAQs about PMPro and Elementor
Is Paid Memberships Pro free to use?
Yes. The core plugin is free. You can build real membership levels and collect payments. Paid Add Ons expand features when you need them.
Can I use any WordPress theme with PMPro?
Yes. PMPro is theme friendly. With Elementor you can style the pages to match your brand, even if the theme is simple.
Can I take recurring payments every month or every year?
Yes. You can set monthly or yearly billing. Stripe and PayPal handle subscriptions. Razorpay works through the supported Add On.
How do I protect download files or templates?
Place them on restricted pages and link members to those pages. You can also use file protection add ons for extra control.
Can I offer discount codes or trials?
Yes. PMPro supports discount codes and trial periods. Use them for limited campaigns. Keep them simple so people do not feel confused.
Final Thoughts
Building a membership site might sound technical at first, but with Paid Memberships Pro and Elementor, it’s surprisingly easy.
You’re not just setting up a plugin — you’re creating a system that helps you earn recurring income, build community, and grow sustainably.
If you’re serious about building your brand or monetizing your audience, now’s the time to start.
👉 Download Paid Memberships Pro, style your pages with Elementor, and turn your WordPress site into a full-fledged membership business today.
And if you ever need help designing or setting it up, you can always reach out to my team at 60Pixel — we’ve built dozens of custom membership platforms for clients across India and beyond.
I hope this guide helps you build a real business with Paid Membership Pro & as I’m wrapping up, here’s the complete checklist to build a membership site with Paid Membership Pro and Elementor…
1. Install and Activate PMPro
- Create a free account on paidmembershipspro.com and download the plugin.
- Upload and activate it from your WordPress dashboard.
- Verify that PMPro auto-creates core pages (Levels, Checkout, Account, Billing, Confirmation).
2. Set Up Membership Levels
- Go to Memberships → Settings → Levels and add your plans (Free, Premium, VIP).
- Define pricing, duration, and recurring options.
3. Restrict Content Strategically
- Edit any post or page → scroll to “Membership Required.”
- Choose the level that can view it & Keep teaser sections public for SEO and conversion.
4. Design Core Pages in Elementor
- Open the PMPro pages with Elementor and apply your brand style & add any widget you like on important pages that will improve conversions.
- Focus on a clean, one-column checkout layout.
- Add testimonials or trust badges for credibility.
- Create a simple, friendly Thank-You page.
5. Connect Payment Gateways
- Navigate to Memberships → Payment Settings.
- Choose Stripe, PayPal, or Razorpay (for India).
- Add API keys, enable test mode, and run a sample payment.
6. Test the Full Member Journey
- Sign up from an incognito window.
- Complete checkout, confirm access to restricted posts, and verify email notifications.
- Fix any friction before going live.
7. Prepare Member-Only Content
- Publish a Getting Started guide linking to your premium content.
- Keep downloads organized on a single page.
- Update regularly to maintain engagement.
8. Boost SEO with Smart Visibility
- Keep some public posts open for organic traffic.
- Use teasers that link to premium content.
- Optimize speed, headings, and meta descriptions.
9. Automate Follow-Up Emails
- Send a short welcome sequence with clear next steps.
- For free members, use nurturing emails to introduce upgrades.
10. Track Key Metrics & Continue Improving
- Monitor sign-ups, cancellations, and refund rates (track all)
- Adjust copy and design based on user behavior to improve your membership site conversions

About the Author
Kuldeep Rathore is a WordPress & Elementor expert and co-founder of 60Pixel. With 3+ years of hands-on experience, he builds fast, SEO-optimized websites for creators and small businesses. Through this blog, he shares practical tutorials and tips trusted by the WordPress community worldwide.