How to Create Elementor Password-Protected Page in 5 Simple Steps (2025)?
👋 Need help building or fixing an Elementor website?
I design fast, conversion-focused WordPress sites using Elementor.
The Problem & the Solutions Upfront: There are times when you need to give access to your content or a feature to only a specific group/people either of your team or your end customers.
No matter what the reason, creating protected content/protected pages becomes a necessity (sometimes).
Unfortunately, there’s no widget/settings offered by Elementor that allows the creation of protected content & I’m sure you’re aware of that.
Hence you might have googled – “how to create an elementor password-protected page” & probably landed on this blog post.
Well, this is the only guide you'll need to read as
In this guide, I'll help you create an Elementor password protected page, covering everything from the basics to advanced customization options.
So Kuldeep, is it still possible or not?
Well, the answer is yes.
Fortunately, with the add-ons, it’s possible.
I’ll be completely honest & let you know right in the beginning that
↳ Creating password-protected content or pages is possible for Elementor pages
but only with third-party (paid) Elementor addons.
Also, the good news is…
It won’t take you a day as the ready-to-import design templates will help you quickly set up your elementor password-protected content.
So without further ado, let’s get into it…
Why Password Protect Your Pages?
Before diving into the technical how-to, let’s understand why password-protecting a page can be crucial:
- Privacy: Ensures sensitive information remains confidential.
- Exclusive Access: Limits content to a specific audience, such as registered members or paying customers.
- Control Over Content: Manage who can view your content, which is especially useful for subscription-based services.
Now that you know the benefits of it, here’s how to do it…
What are the Methods to Create Elementor Password-Protected Pages?
When it comes to creating a password-protected page in Elementor, there are several ways to go about it.
Basically, two simple ways – either using a plugin or an Elementor addons.
- Method 1: Using Elementor Addons
- Method 2: Using WordPress Plugin
Let’s dive deep into both of the methods…
Method 1: Using Elementor Addons (Freemium)
I’m sure that you’re pretty much aware that whenever there’s a need for an extra feature in Elementor, there’s an addon fulfilling that need.
But surprisingly, not for this feature.
Out of a dozen Elementor addons, only a handful of Elementor addons provide this feature of password protecting your content, section, or an entire page & here they are…
- The Plus Addons: Offers a “Protected Content widget“ that lets you add custom content via text editor or load a saved Elementor template. Allows you to restrict sections/pages that certain user roles or passwords can only access.
It's one of the best ones out there & used by a lot of Elementor folks.
- ElementsKit: Similar to The Plus Addons; offers a “Protected Content widget” with extensive styling options. It's a new feature recently added to the ElementsKit Pro.
- Essential Addons: Offer a “Protected Content Widget” & also a “Content Protection Extension” that allows you to restrict certain sections/pages that can only be accessed by user roles or passwords.
- ElementPack: It also offers a “Protected Content Widget” with almost similar functionalities to the above-mentioned addons but lacks some features & it's not that advanced.
⚠️ Spoiler Alert: You'll need the Pro version for most of the Addons as “protecting content” is a premium feature.
Method 2: Using Plugins (WordPress)
Apart from Elementor Addons, a handful of plugins are available on the WordPress repo
for password-protecting your content.
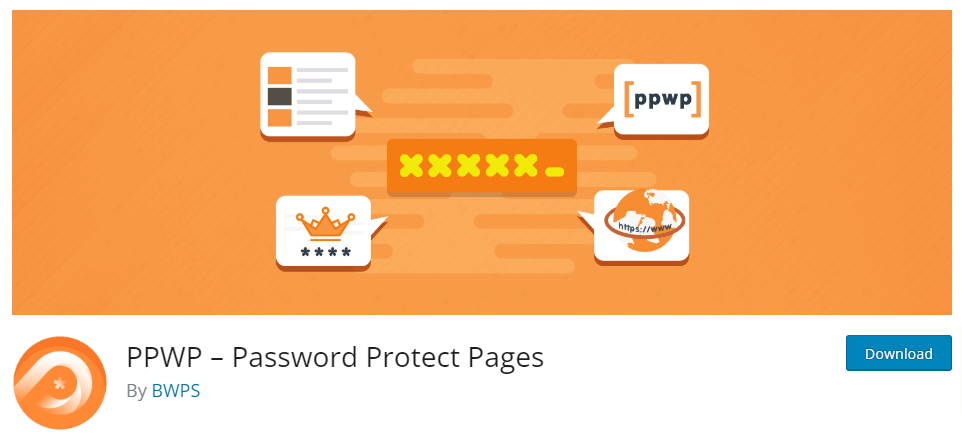
- PPWP – Password Protect Pages
- It lets you lock parts of content or whole pages.
- You can set up multiple passwords or even use a CAPTCHA system.
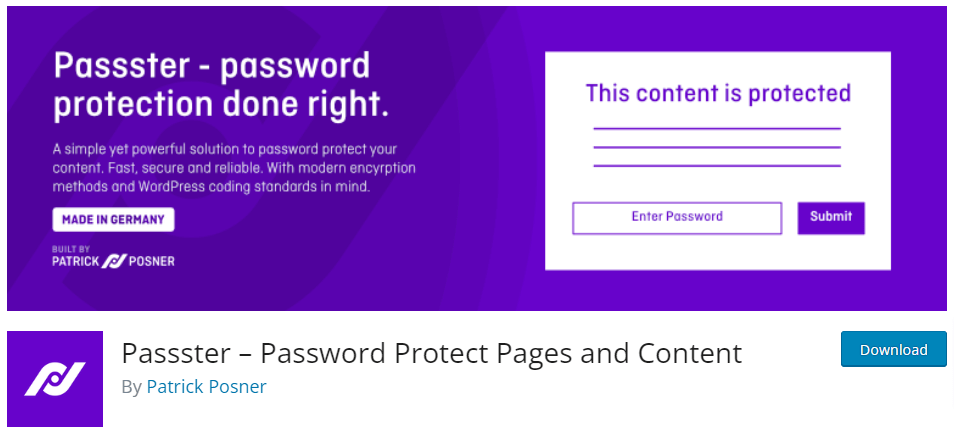
- Passster Pro
- Protects entire pages or just parts of them.
- Integration with Elementor is smooth, making it user-friendly.
The Password Protect WordPress (PPWP) plugin is a powerful WordPress plugin that offers password-protection functionality for both pages and posts. Here's how to use it:
Another one is the Passster plugin & here’s the straightforward process…
My preferred way to password-protect your Elementor pages is using the Elementor addons.
Out of all 4 Elementor addons & 2 plugins, I recommend using The Plus Addons to create a password-protected page in Elementor & here's why…
The Plus Addons is one of the most promising ones I’ve encountered.
As it offers over 120+ widgets, and 100+ Ready to import templates along with the Plus Features such as Plus Creatives, Plus Design, Plus Listing, Plus Builder, etc have drawn a lot of attention to this addon recently & the number of downloads for this plugin is increasing day by day.
Currently, it has over 100K+ downloads and a customer rating of 4.5 on WordPress.org.
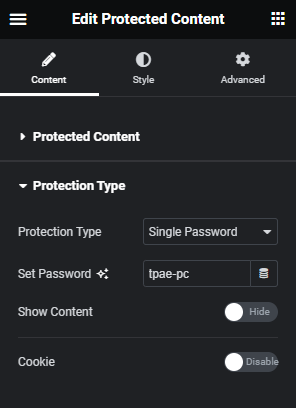
Its Protected Content widget allows you to restrict sections/pages that certain user roles or passwords can only access. Also, within the protected content widget, you can add any custom content via text editor or load a Saved Elementor Template.
Plus, it offers ready-made templates that help you quickly password-protect any widget or section on the page.
Here are the complete details about the widget…
Settings Offered:
Step-by-Step Guide to Creating an Elementor Password-Protected Page Using The Plus Addons
Now that we've explored the different methods for creating a password-protected page in Elementor, let's dive into a step-by-step guide for using The Plus Addons.
Step 1: Download, Install & Activate The Plus Addons

- First, you’ll need to download the pro version. Yes, you heard that right. The password-protected feature isn’t available in the free version.
- So, to get the pro version; Click on this special link & use the code:
KULDEEP10 to Get 10% OFF on annual plans & 20% renewal discount. - Next up, download the pro version and install & activate The Plus Addons on your WordPress site.
Step 2: Setup your Page
- Start by creating a new page in WordPress, go to Dashboard > Pages > Add New.
Give your page a snappy title.
Step 3: Use The Protected Content Widget
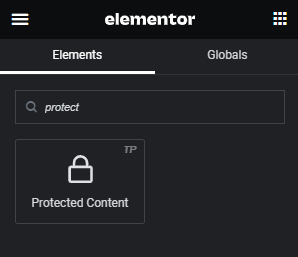
- Open your page in Elementor.
- Drag and drop the “Protected Content” widget from the widget panel onto your page.
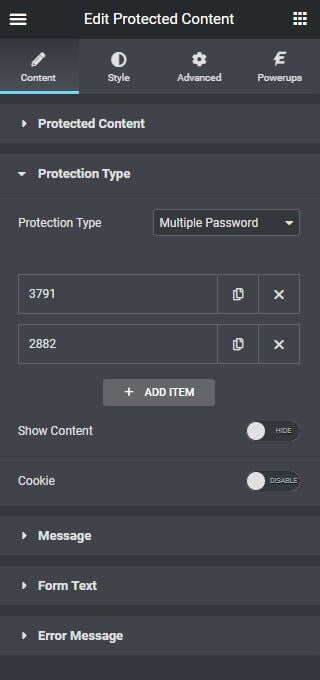
- Set the protection method to either user role, single password, or multiple passwords & accordingly set the password or user roles.
Step 4: Customize The Style
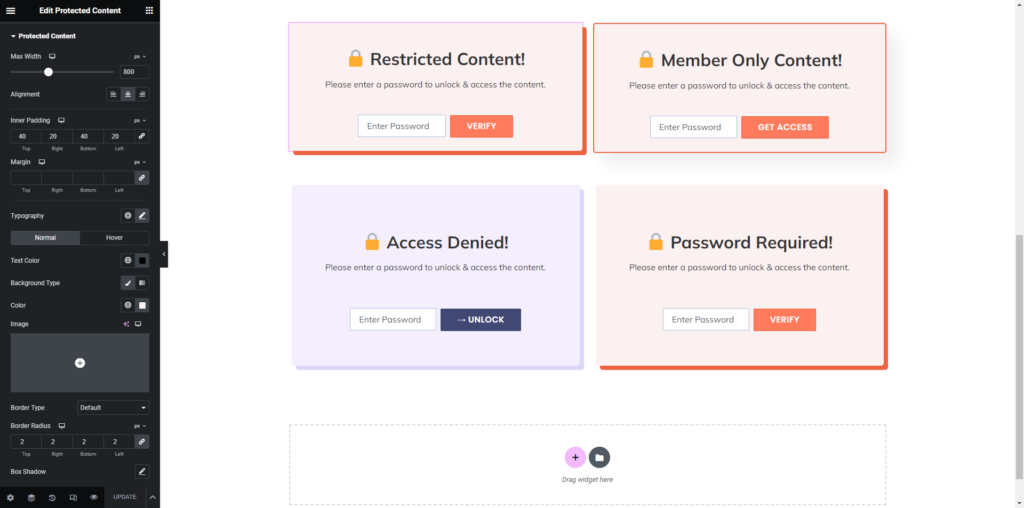
This is where you can get creative:
- Design your prompt box.
- Style it to match your page.
- Make sure it feels inviting so users are encouraged to enter the password.
Step 5: Test your Protected Content Page
Always test to make sure everything works as expected. Try accessing the page from different browsers or ask a friend to give it a whirl.
Step 6: Publish the page
- Once you've set the password, customized its styling & checked its functionality, publish the page for your target audience/use case.
And that's it!
With these 6 simple steps, you can easily create a password-protected page in Elementor using The Plus Addons.
🔖 Most Read Elementor Tutorials…
Customizing Your Elementor Password Protected Page/Content
Once you've created your password-protected page, you can customize it to your heart's content using Elementor's powerful design features.
Here are some tips for customizing your password-protected page:
- Customize the password form: The password protection widget includes a basic password form by default. However, you can, or rather say, you should customize the form to match your brand and style. Just hop on to the style tab & play around.
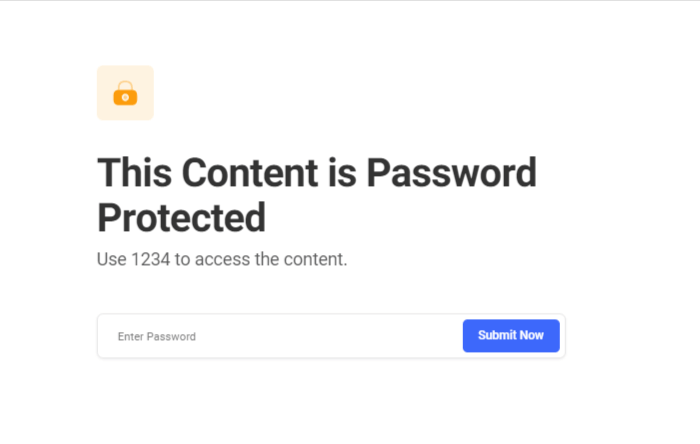
- Customize the password message: When users try to access a password-protected page, they'll see a message asking them to enter the correct password.
You can customize this message to provide more information or to match your brand's tone and voice. Here, make sure to give a clear message.
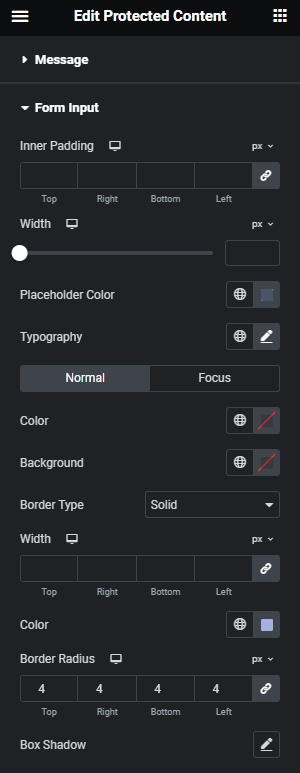

- Add custom styling & Custom functionality: The Plus addons styling tab allows you to add custom styling to your password-protected page, including custom fonts, colors, and layouts.
Also, if you need custom functionality, such as restricting access by user role, you can do so in the advanced settings.
Troubleshooting Common Issues
While creating password-protected pages in Elementor is generally straightforward, there are a few common issues that you might encounter.
Here are some tips for troubleshooting these issues:
- Password not working: If users are having trouble accessing a password-protected page, make sure that the password is correct and that it hasn't been changed recently.
- Page not displaying correctly: If your password-protected page is not displaying correctly, make sure that all of your elements are properly aligned and that there are no conflicts with other plugins or themes.
- Access restrictions not working: If you're trying to restrict access to a password-protected page by user role, make sure that the user roles are properly configured and that there are no conflicts with other plugins or themes.
Best Practices for Password-Protected Pages
- Keep Your Passwords Secure: Well, it’s basic step but an important one. Just regularly update the passwords of your protected pages and ensure they are strong and hard to guess.
- Mobile Responsiveness: Ensure that the password prompt is easily accessible and functional on mobile devices. Test different devices to ensure a smooth user experience.
- SEO Considerations: Remember that password-protected pages are not indexed by search engines. This means they won't appear in search results, which is ideal for private content but should be considered if you’re protecting public-facing content you still want to rank.
Now before wrapping up, let me quickly answer some of the FAQs…
🚀 Useful Elementor Tutorials to Level up your Elementor Game…
FAQs
1) What is content protection in Elementor?
In simple words, the Content Protection feature allows you to restrict any Elementor Content by setting up passwords or user roles like logged in/logged out, customer, subscriber, etc.
Using The Plus Addons Protected Content Widget, you can restrict any Elementor Content be it a widget, section, or page.
2) Is it possible to have multiple passwords for a single page?
Although WordPress natively supports only one password per page, using addons like The Plus Addons, ElementsKit, etc. you can easily set multiple passwords for a section and even a single page.
3) How do I password-protect an Elementor section?
Simply by using The Plus Addons Protected Content Widget, you can easily password-protect any section of the Elementor.
It offers settings to set multiple protection types (password or user role), custom frontend messages, error messages, cookie settings & many quick styling options.
4) Which is the best addon to password-protect the Elementor page?
There are 4 Elementor addons that provide such password-protect functionality, out of which The Plus Addons is the best addon to password-protect your Elementor page, section & any content you wish.
Wrapping Up
Setting up a password-protected page in Elementor doesn’t have to be complicated.
Whether you choose an addon, a plugin, or my preferred method with The Plus Addons, you’re just a few clicks away from giving your content the privacy it deserves.
By customizing your password-protected page, you can create a unique and engaging experience for your users.
And by troubleshooting common issues, you can ensure that your password-protected page is always working as intended.
So, will you use The Plus Addons or ElementsKit or any plugin to protect your content?
Do let me know in the comments.
Apart from that, if you’ve got any questions, feel free to drop them in the comments & I’ll be more than happy to answer.
🔌 Elementor Widgets to Enhance your Elementor Website…

About the Author
Kuldeep Rathore is a WordPress & Elementor expert and co-founder of 60Pixel. With 3+ years of hands-on experience, he builds fast, SEO-optimized websites for creators and small businesses. Through this blog, he shares practical tutorials and tips trusted by the WordPress community worldwide.
Good stuff, appreciate you taking the time to write this up.
Thanks John 🙂